HP PCs – Troubleshooting Touch Screen Issues (Windows 10, 8)
The computer touch screen does not respond or responds inaccurately.
Screen does not respond to touch, or responds intermittently
Use the troubleshooting steps in this section if the touch screen does not respond, or if the screen sometimes responds and sometimes does not.
Step 1: Confirm the computer has a touch screen
If the screen has never responded to touch, but you think it should, use one of these methods to confirm your computer has a touch screen.
- In Windows, search for and open View pen and touch info. If the Pen and touch section reads No pen or touch input is available for this display, the computer does not have a touch screen.
- Check the product specifications for your computer model on the HP Customer Support website.
- Check the labels on the computer and on the product packaging. Notebook and All-in-One computer models equipped with touch screens are branded with the word Touch or TouchSmart.
Read More : How to Use Windows File Recovery on Windows 10
Step 2: Enable and reinstall the touch screen driver in Device Manager
Your touch screen might not respond because it is not enabled or needs to be reinstalled. Use Device Manager to enable and reinstall the touch screen driver.
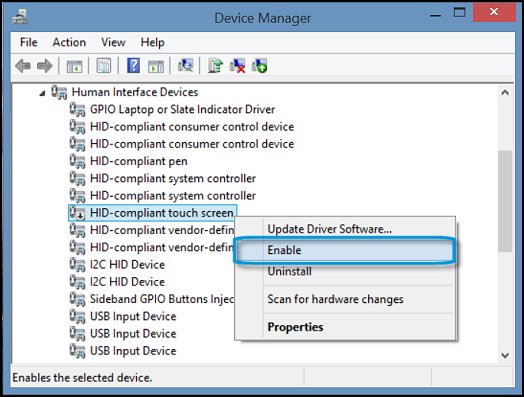
- In Windows, search for and open Device Manager.
- Expand the Human Interface Devices list.
- Right-click the touch screen device, and then click Enable, if possible. If the Enable option does not display, continue to the next step.
- Tap the screen to see if it responds. If it does not, continue with these steps.
- Right-click the touch screen device, and then click Uninstall.
- Restart the computer to reinstall the touch screen driver.
- Tap the screen to see if it responds. If it does not, continue to the next step.

Read More : How To Turn Off Sticky Keys In Windows 10
Step 3: Configure the touch display
Configure the touch display to identify your screen as a touch screen.
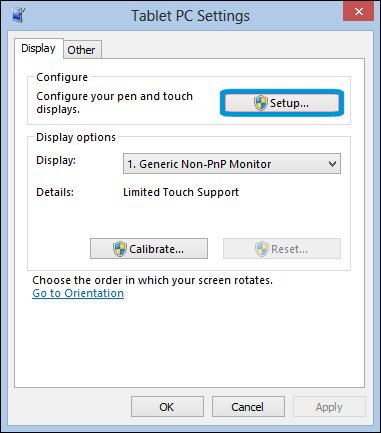
- In Windows, search for and open Calibrate the screen for pen and touch input.
- On the Display tab, click Setup.
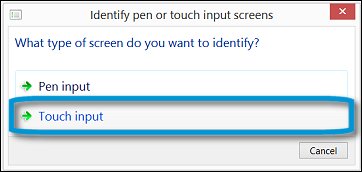
- Click Touch input.
- Follow the on-screen directions to identify your screen as a touch screen.
- Tap the screen to see if it responds. If it does not, continue to the next step.
Step 4: Install Windows updates
Device driver updates released through Windows update might resolve touch screen issues.
Windows 10
Install the latest Windows 10 updates.
- In Windows, search for and open Check for updates.
- If updates are available, they begin installing automatically.
- When update installation is complete, tap the screen to see if it responds. If it does not, continue to the next step.

Read More: How To Uninstall Cortana in Windows 10
Windows 8
Install the latest Windows 8 updates.
- Click the Windows icon, and then search for and open Windows Update.
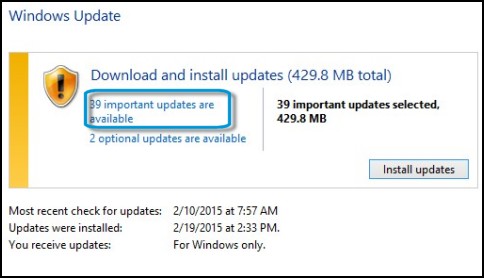
- Click Show updates.
- Click important updates are available.
- A list of available updates opens in a new window. Select updates from the Important and Optional tabs. Make sure you install all device driver updates.
- Click Install.
You might need to restart your computer to apply the updates. - When update installation is complete, tap the screen to see if it responds. If it does not, continue to the next step.

For more information, go to HP PCs – Updating Drivers and Software with Windows Update (Windows 10, 8).
Read More:
Step 5: Perform a touch screen diagnostic test in HP Hardware Diagnostics
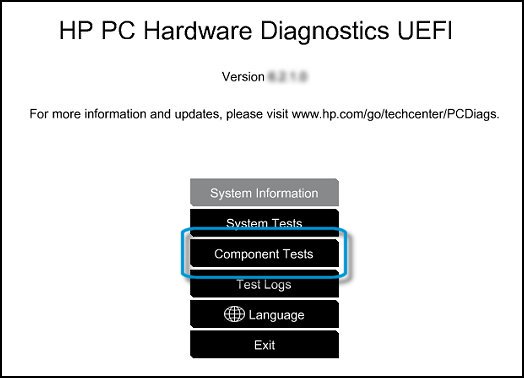
Use the HP PC Hardware Diagnostics UEFI tests to detect problems with the touch screen hardware.
- Connect the AC adapter to the computer.
- Press the Power button for at least five seconds to turn off the computer.
- Turn on the computer and immediately press Esc repeatedly, about once every second. When the Startup menu appears, press F2.
- When the HP PC Hardware Diagnostics screen displays, click Component Tests.
- Click Touch Screen.
- There are two interactive touch screen hardware tests. Click Touch Pointer Test first.
- Read the on-screen instructions, and then click Run once.
- Touch each of the blocks on the screen to erase them. The test ends after you erase all the blocks or after three minutes have passed, and the results display.
- Click Main menu to return to the main screen.
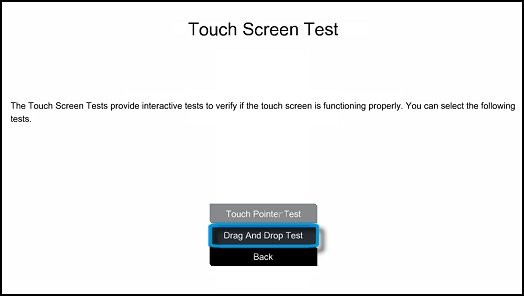
- Click Component Tests, and then click Touch Screen.
- Click Drag And Drop Test.
- Read the on-screen instructions, and then click Run once.
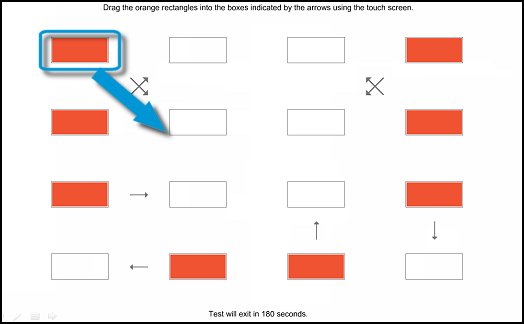
- Drag each orange rectangle to the box indicated by the arrows with a finger or a stylus. The test ends after you reposition all the blocks or after three minutes, and the results display.


- If the diagnostics tests pass but the touch screen still does not respond during regular use, continue to the next step.
- If one or both tests fail, a 24-digit code, or failure ID, displays. Contact HP and provide this code. The failure ID is also available in Test Logs on the main menu.
Step 6: Adjust the power management settings for your touch screen
Power settings can cause the touch screen to stop working after waking from sleep. Change the power settings so that the touch screen stays active while the computer is in sleep mode.
NOTE: Changing this setting might result in more power consumption during sleep mode.
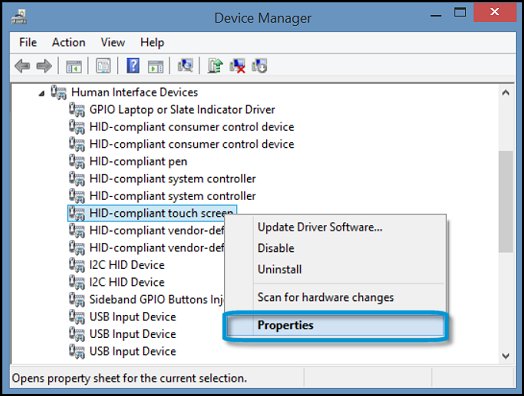
- In Windows, search for and open Device Manager.
- Expand Human Interface Devices list.
- Right-click the touch screen device, and then click Properties.
- On the Power Management tab, uncheck Allow the computer to turn off this device to save power, and then click OK.

The touch screen should remain working after waking the computer from sleep. If it does not, continue to the next step.
Step 7: Perform a hard reset (notebook PCs) or full shutdown and restart (All-in-One PCs)
If none of the previous steps worked, perform a hard reset or full shutdown and restart.

